Mastering Color Separation in Screen Printing: Insider Secrets Revealed
Hey there, fellow screen printers and creative minds! If you’ve ever marveled at those perfectly aligned and jaw-dropping screen prints, you’re in for a treat. I’m here to spill the beans on how to achieve flawless color separation in screen printing, whether you’re a seasoned pro or just starting out on your printing journey. So, grab a comfy seat, and let’s dive into the nitty-gritty of making your prints pop like never before.
Unveiling the Art of Screen Printing Color Separation
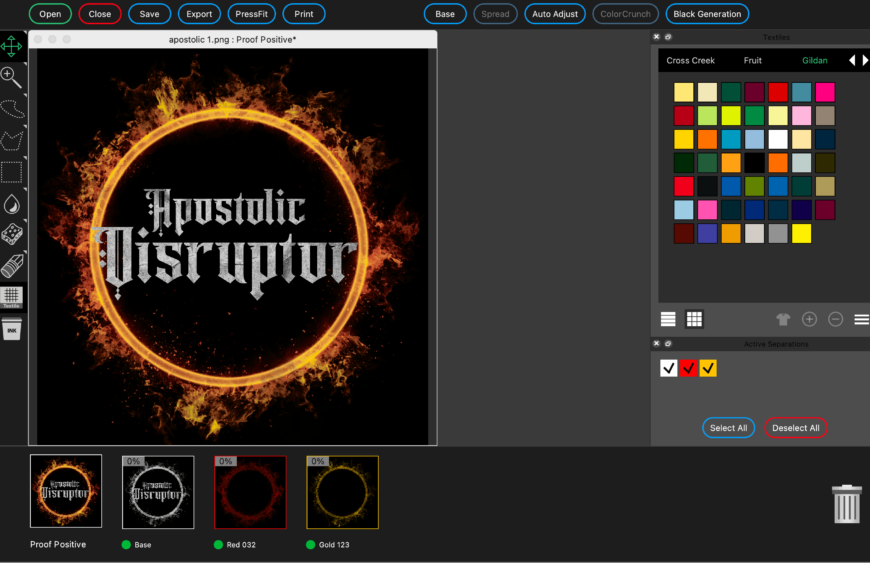
What’s the Buzz About Color Separation? You know that feeling when you pull a squeegee across the screen and reveal your design, only to find a misaligned mess? Yep, we’ve all been there, and it’s not a pretty sight. That’s where screen printing color separation comes to the rescue. In simple words, it’s the technique that involves separating your design into individual color components, ensuring each color is perfectly aligned on your canvas – be it a t-shirt, poster, or any other surface you’re jazzing up.
The Manual vs. Automatic Dilemma Okay, picture this: I was once knee-deep in a challenging design with multiple colors. Manual color separation had me feeling like a circus performer trying to juggle flaming torches while riding a unicycle. That’s when I decided to give automatic color separation a spin, and boy, was it a game-changer! While manual separation is like a rite of passage, automatic and semi-automatic methods can save you from a potential headache, especially when tight color registration is the name of the game.
Setting the Stage for Successful Color Separation
Gearing Up with the Right Tools Just like a chef needs the finest ingredients to whip up a masterpiece, a screen printer needs top-notch tools for color separation. I recall upgrading to high-quality screens, frames, and hinges, and the difference was like night and day. It’s like having a sharp knife in the kitchen – it just makes everything smoother. Investing in precision equipment might pinch your wallet a bit, but the payoff in color separation quality is totally worth it.
Workspace Magic Ah, the magical dance of arranging screens, substrates, and the printing station for color separation. I’ve had my fair share of fumbling around in dimly lit rooms, squinting like a mole trying to find the perfect alignment. Trust me, good lighting and clear visibility are your best pals here. Also, take a moment to praise the screen printing gods for adjustable stations – they’re a lifesaver!
Mastering the Artwork Puzzle for Color Separation
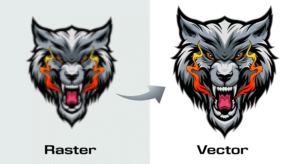
Vector vs. Raster – The Battle of the Titans Now, let’s talk artwork for color separation. It’s like the foundation of your masterpiece. Think of vector artwork as your blueprint – clean, precise, and ready to guide you through color separation. Raster artwork, on the other hand, is like trying to draw a Mona Lisa with chunky crayons. For super-sharp and pixel-perfect color separation, always lean towards vector designs. Your future self will thank you.
Colors Galore: Color Separation Techniques Picture this: You’re gearing up for a multicolor extravaganza. Color separation is your secret weapon here. It’s like having a backstage pass to the printing show for color separation. And if you’re aiming for gradients and that dreamy shading, say hello to halftones. Trust me, this technique is like adding a dash of magic to your color-separated prints.
The Epic Battle: Color Separation Screen Alignment
Taming the Screen Beast for Color Separation Remember the days when screens acted like rebellious teenagers, refusing to stay in place for color separation? Well, tensioning screens is the Jedi move that saves the day for color separation. It’s like teaching them some manners. And don’t even get me started on the off-contact distance – it’s your knight in shining armor against smudgy prints and ink disasters for color separation.
Enter the Hero: Pin Registration Systems for Color Separation Now, let me spin a tale about pin registration for color separation. It’s like a trusty sidekick that swoops in to save the day for color separation. I vividly remember the first time I tried pin registration for color separation – it was like unlocking a secret chamber of perfect alignment. This nifty system ensures that your screens and substrates are in perfect harmony for color separation, resulting in prints that would make even the printing deities nod in approval.
Nailing the Printing Process with Color Separation
Squeegee Sorcery for Color Separation Ever tried making pancakes with an uneven hand? Printing without proper squeegee technique feels a lot like that for color separation. Finding that sweet spot of pressure and angle is your golden ticket to consistent ink deposition for color separation. I’ll confess, my early attempts often looked like a colorful mess. But once you master this art, your color-separated prints will emerge like well-behaved angels.
Test, Adjust, Repeat for Color Separation Imagine this: you’re all set to print your color-separated masterpiece, but wait! Make a pit stop for test prints. These little guys are like your practice runs before the main show of color separation. I can’t tell you how many times they’ve saved me from embarrassing blunders for color separation. Adjusting based on test results is like fine-tuning your instrument before a grand symphony – the difference is music to your eyes.
Troubleshooting Like a Pro for Color Separation
Ink Bleeding Woes for Color Separation Ah, ink bleeding – the nemesis of clean lines and crisp edges for color separation. I’ve had my fair share of battles with this notorious villain for color separation. The key? Viscosity! Yes, ink viscosity can make or break your color-separated prints. It’s like finding the Goldilocks zone – not too thick, not too thin – just perfect for flawless color separation prints.
Ghosting and Misalignment – The Uninvited Guests for Color Separation You’ve painstakingly aligned your screens for color separation, and then bam! Ghosting and misalignment crash the party for color separation. Been there, hated that. But fear not, my friends. Double printing and registration marks are your trusty allies for color separation. They’ll have those pesky ghosts running for cover and ensure your color-separated designs stay right where they belong.
After the Ink Dries: Color Separation Edition
The Heat is On: Curing and Drying for Color Separation Congratulations, your color-separated prints are out in the wild, and they look ah-mazing. But hold your horses! Proper curing is like the finishing touch of a master painter for color separation. A curing oven is your secret weapon here – it ensures that your color-separated prints stand the test of time. No more ink mishaps after a wash or two!
Eagle-Eyed Inspection for Color Separation Before you send your color-separated prints off into the world, play the role of a detective. Inspect each color-separated print with the scrutiny of a hawk. It’s like searching for hidden treasure – only this time, you’re hunting down any


